Updating Firmware for Dual-Channel Streaming on the RL500
- Upgrade Software and firmware files: https://drive.google.com/file/d/1kRXLdslLTHfwVhD4BeYnN2_kgiYe0Ys3/view?usp=sharing
Upgrade v2.9
V2.0.57 Firmware file (VX752A_G50.V_V2.0.57_24M_20230925.img)
PC
RL500
LAN connection for PC and Camera
Steps for Loading Firmware
- Download Upgrade Software.
- Connect the power cord to the camera and power on (let it complete "check sequence").
- Connect the camera and PC to LAN.
- Select the camera in the devices window. Default IP is 192.168.100.88.

- On the PC, go back to Network Properties and set the computer back to "Obtain an IP address automatically," and "Obtain DNS server address automatically."
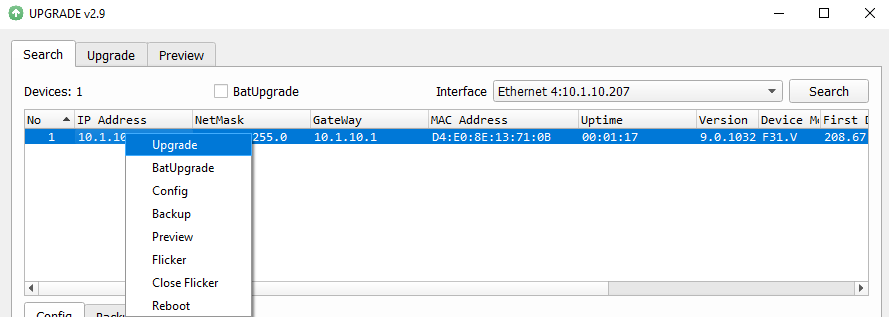
- Right-click on the device and select "Upgrade".
Confirm that the Upgrade tab loads with Type = MTD and the IP address of the camera listed. Also, ensure that "Type1" is selected in the bottom right dropbox.
- Select Query to see current Version Information.
- Select Open and locate the first firmware file (VX752A_G50.V_V2.0.57_24M_20230925.img). It is important to select "MTD" and "TYPE1" as highlighted in the picture below.
- Select Upgrade. The camera will restart and run through the startup "check sequence" three times and a Success prompt will open after the 2nd reboot.
Once completed, select Query and confirm that the SOC and ARM has updated as displayed in the screenshot below:
Related Articles
Fix for Clear Touch Interactive PC Module Shutting Down Using Streaming Services.
The following fix will apply to panels of the following series: 6000U, 6000K, 6000K+, 8086MAX, 7000X, and 7000XE. If you have experienced your Clear Touch Interactive PC module shutting down and/or going to a black screen and displaying "No Signal" ...6000K+ Firmware Update Record
Released week of 4/12/2021 (Firmware Revision 03/25/2021) Repaired - Canvas app icon on sidebar loads Canvas instead of Note Repaired - PC power on when the startup is Android OS Squashed - Android on-screen keyboard Shift key bug. Annotation tool ...Firmware Files for Clear Touch Panels
UPDATED 04/06/2026 IMPORTANT: To perform a manual firmware reload of your panel, follow the steps in this guide: Firmware Reload Guide Please note that new USB formatting rules will apply to Android 15 files. Please refer to the reload guide for ...Updating Firmware for the RL500 to achieve NDI 6.0.1
Items Needed Upgrade Software and firmware files: https://drive.google.com/file/d/1mGjcYLZY8C2Rw8MQWZazVB7VIQK_jJwj/view?usp=sharing Upgrade v2.9 Firmware file (VX752A_G50.CT_V2.0.03_24M_20250427.img) PC RL500 LAN connection for PC and Camera Steps ...Updating firmware for the DC200 - Achieve passwordless network connection
When the DC200 was launched, it required a WPA2-Personal network configuration. The user could find the SSID in the camera web interface, select it, and enter the correct password. We have since learned that it could not connect to a passwordless ...