Command API and Integration with Intrado Revolution
This guide will help you test and implement a Command API that will allow an Alert automation to occur from a 3rd party emergency notification system. To know if your provider is compatible with our API, please check the list on our Command software page. For this document we will ensure that you can test and confirm the function of the API through Postman. Once this has been successful, please follow your emergency alert provider's documentation for specifics on how to use the API.
Before you start, please have the following available:
The latest .JSON file script for copy/paste: Command API v4.3
Alert image posted to a public URL (example: http://www.getcleartouch.com/media/CT24_Command-API-Test-Graphic-m3840-x-2160-px-1.png)
Text editor software
Familiarity with Postman: Postman Documentation
Command Organization Code and Device Groups setup correctly
Steps for Preparation
Open a text document and record the Command Organization Code
Upload the Alert image to a public URL
Copy/paste the URL into a text document
Download the image and import it into an MD5 hash utility. We use this: https://emn178.github.io/online-tools/md5_checksum.html
Copy/paste this hash to a text document
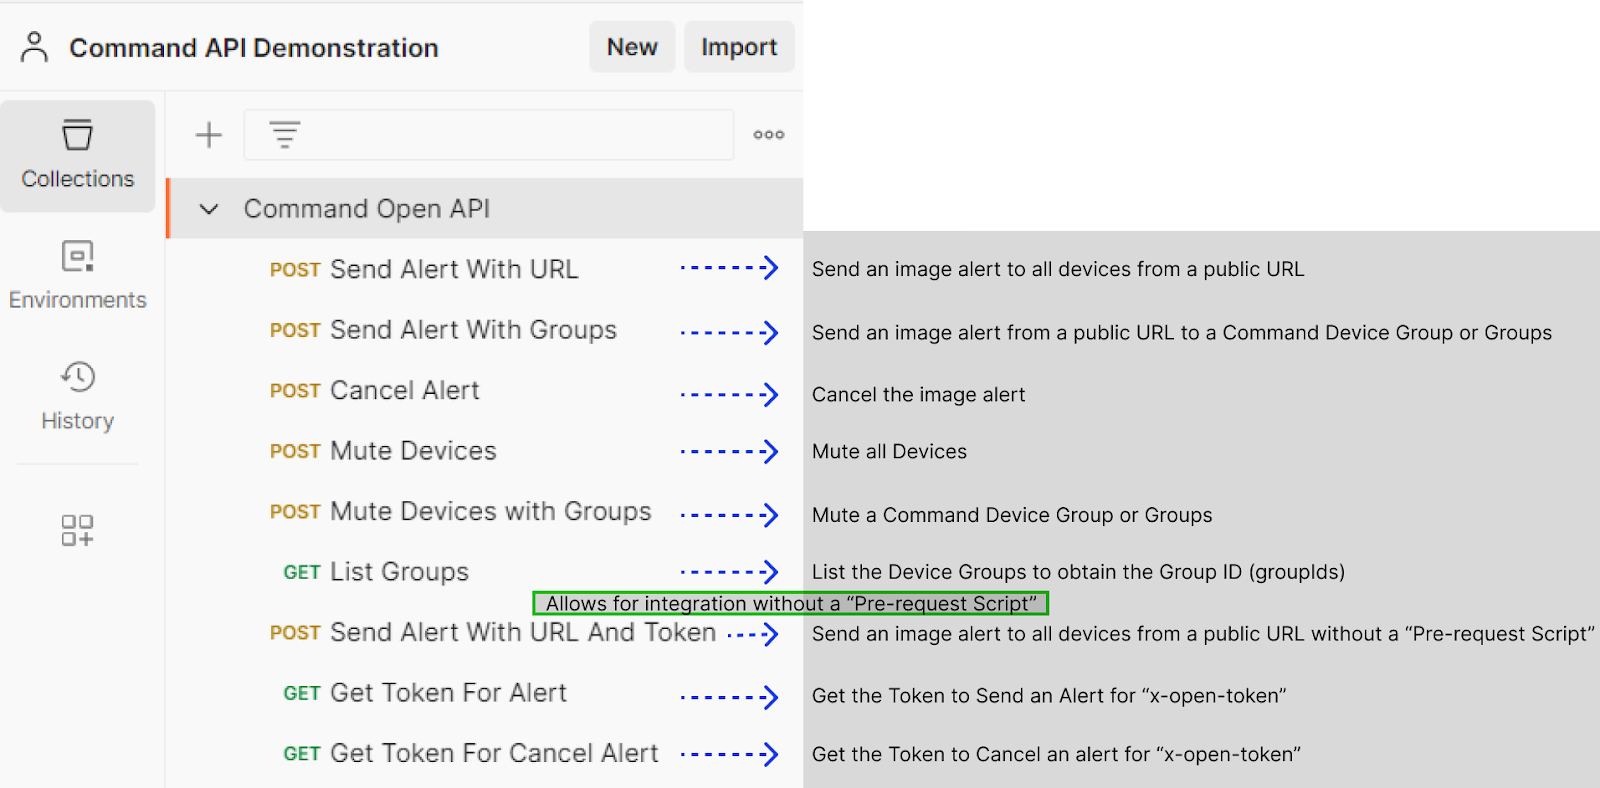
Import the .JSON file into Postman (below is a description of the purpose for each POST or GET request)
Send Alert to a Device Group
List Groups
Select “List Groups”
In the GET field replace {your school code} with your Command Organization Code.
Send the GET request
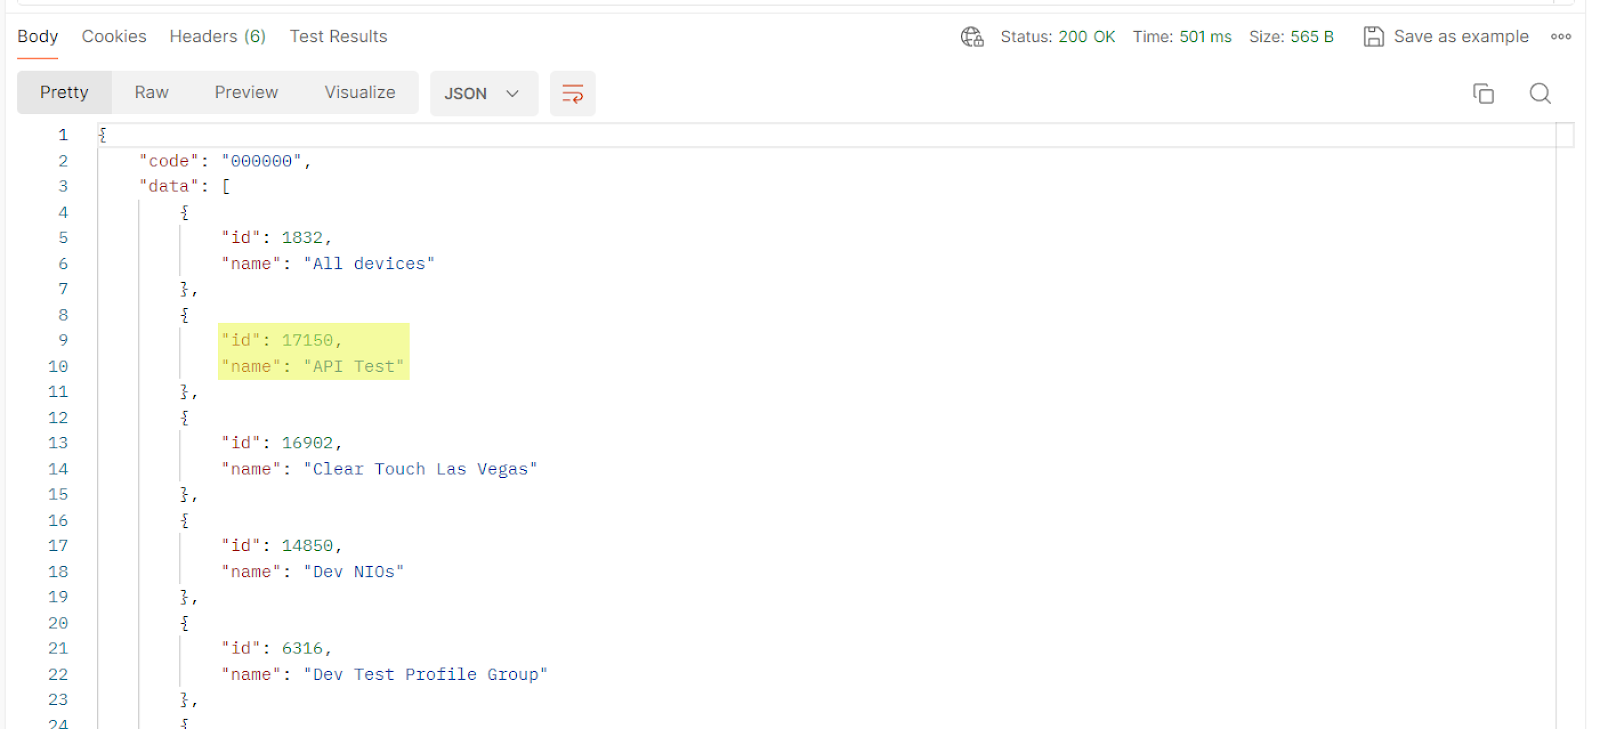
The Response field will generate a list of all the Groups with the “id” also known as “groudIds”. In the example below, the groups are listed and I can copy/paste the “id” of the “API Test” group.
Send the Alert to the Group
Select “Send Alert With Groups”
Enter the following (already gathered) information
“code” = Command Organization Code
“groupIds” = “id” from List Groups GET request
“url” = public URL of Alert image
“md5” = MD5 hash generated by the utility

Select “Send” to send the Alert to the specified Group
Multiple groupIds can be entered.
=======
Send Alert to Group with Token Header
Obtain the Token
Th Revolution software does not allow for a Pre-Request Script so it is necessary to create a unique token by using a GET request. The following steps need to be taken after the Alert send has been tested and verified.
Select All and Copy the “Send Alert with Groups” script into a text editor
In the GET field replace {your school code} with your Command Organization Code.
Paste the Copied script into the Body field
Select “Send”
In the Body of the Response, Copy the “data” text as in the example below and paste it into a text editor

Send the Alert with a Token
Select the POST “Send Alert With URL And Token” and view the “Headers”
Paste the Token in the Value field on the “x-open-token” row
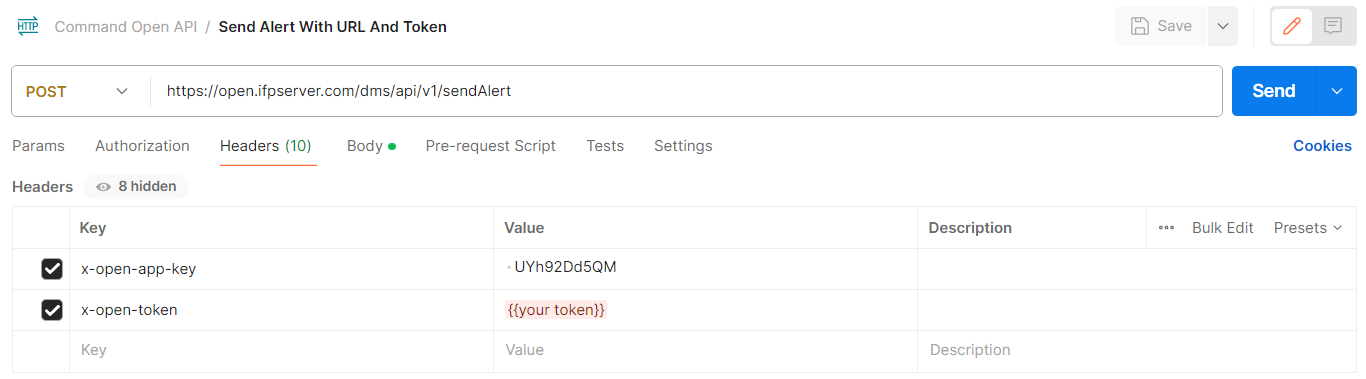
Note: the x-open-app-key and the x-open-token will be entered in Revolution.
Select the Body tab and copy/paste your original script into the field (example image below)
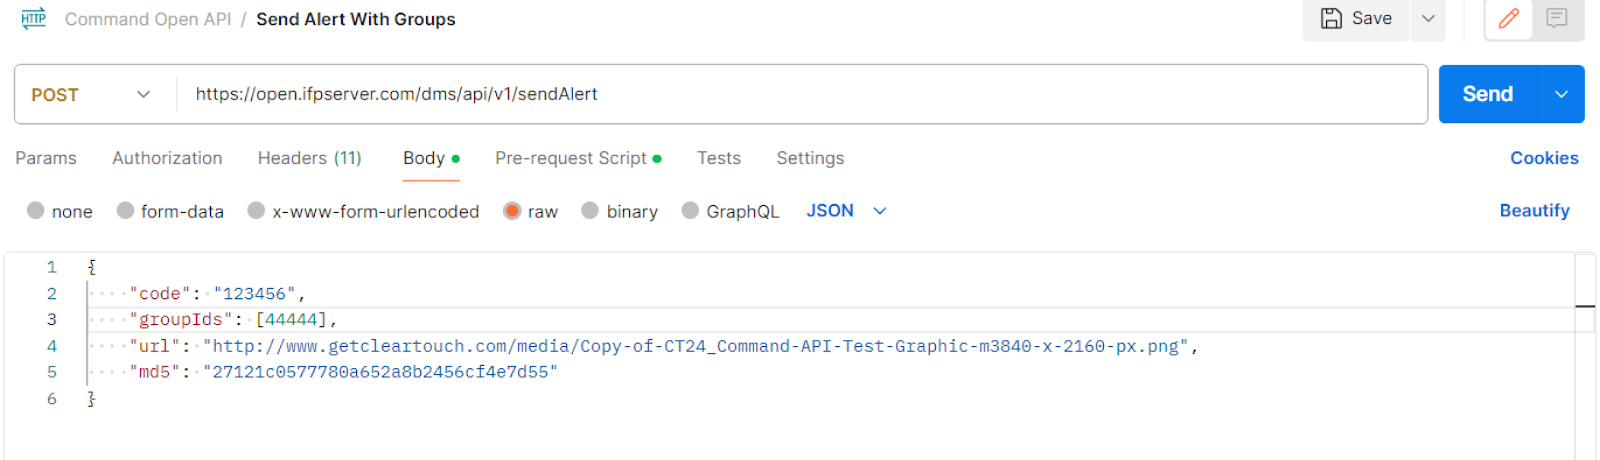
Select Send to confirm it is successful.
Cancel an Alert with a Token
In this example we are not going to specifically target a “Group” within an Organization for the Cancel request. A Cancel request to the whole Organization will succeed in canceling the Alert for one Group (or many Groups).
Obtain the Token
Select “Get Token for Cancel Alert” and enter the Organization Code in the GET request and in the Body of the text where it states “your school code”
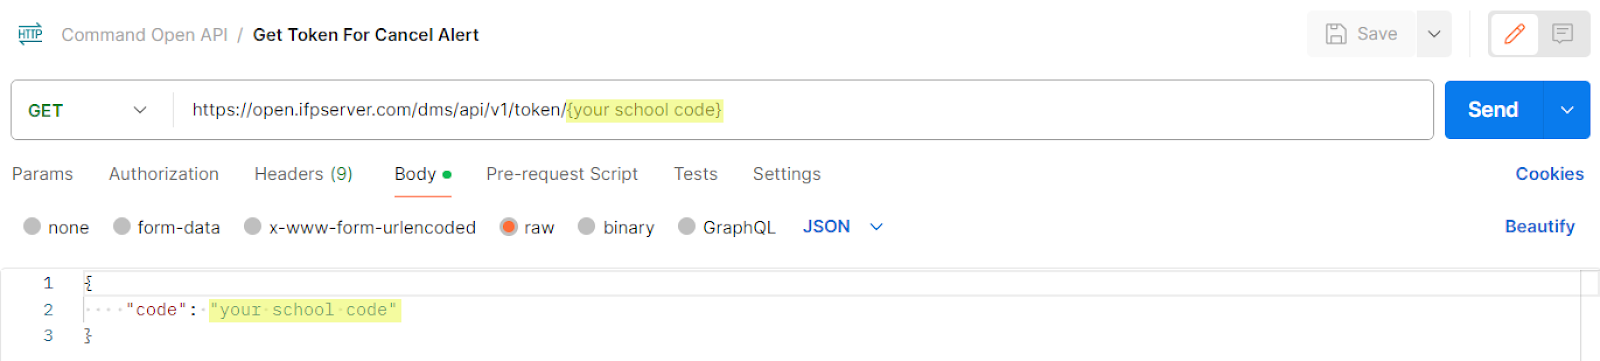
Select “Send” and copy/paste the “data” text into a text editor (example image)

Cancel the Alert
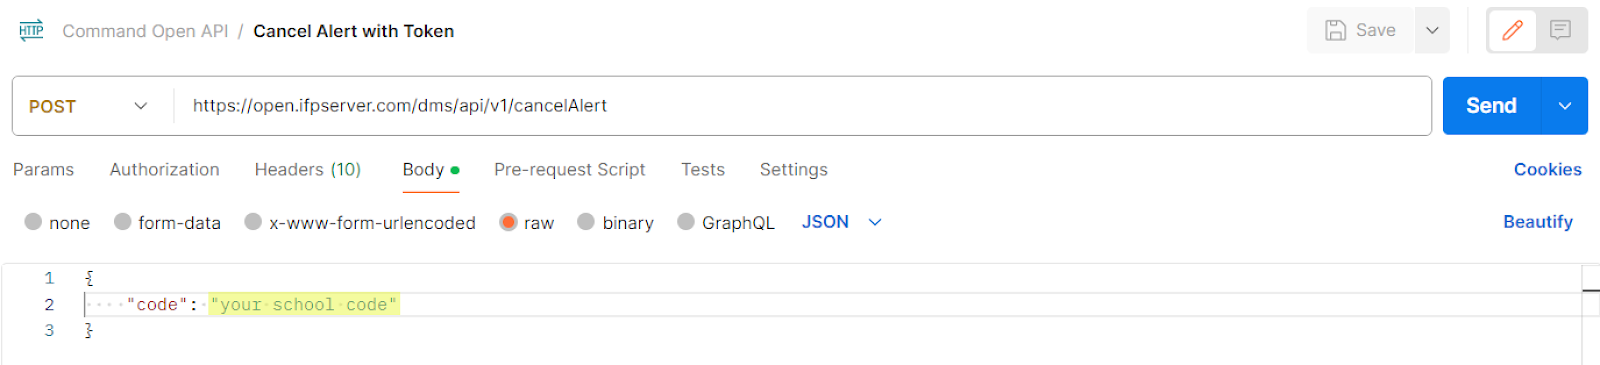
Select Cancel Alert with Token
Select Headers and Paste the Token in the Value field on the “x-open-token” row.
Select Body and enter the Command Organization Code in the “your school code” section
Select “Send” to Cancel the Alert
Intrado Revolution:
This link will provide a guide for using the Webhook within Intrado Revolution: https://www.syn-apps.com/downloads/User%20Guides/Revolution_Help/en-us/Content/Configuration/Notifiers/Webhook_Notifier.htm?Highlight=webhook
Related Articles
Command API and Integration with Singlewire Informacast
This guide will help you test and implement a Command API that will allow an Alert automation to occur from a 3rd party emergency notification system. To know if your provider is compatible with our API, please check the list on our Command software ...Command Feature Update List
This article provides an update record for the Command App on the Clear Touch panel. Command is our Panel Management software that allows Administrators to send messaging, notifications, and alerts to the Clear Touch IFP, as well as manage ...Commands Guide for Bytello Command
Command List To access the Command List, first, from the Command Dashboard, click on Manage. From the Manage menu, click on Devices or Groups. You can either send a Command out to specific devices, or send a Command out to an entire designated Group. ...Install Collage updates through Command
Please reach out to our Support Team to receive the APK for the latest version of Collage. To know if this version is compatible with your Clear Touch IFP, please refer to the Collage feature update list: ...How to set up WOL server for powering on panels through Command (Bytello)
Clear Touch Interactive’s Command software is a cloud-based remote management tool that allows administrators to seamlessly access, monitor, and control their Clear Touch Interactive flat panels using any web-connected device. One of the features ...